FOREWORD/ UPDATE FOR THE YEAR 2013:
There’s an updated Prall’s exporter called MESA
http://puppet-master.net/?page_id=259 now that should provide a little
less painful workflow than the one explained here. You may want to
consider using MESA instead of my workflow with Prall’s smd exporter
(which was optimized for Maya 6(?) several years ago). My workflow works
great for Maya 2011 and 2012 and earlier versions. It hasn’t been
confirmed to work for 2013 and later versions though.
Who you are:
A person, who finally found this tutorial, after he couldn’t find an
up-to-date tutorial for Maya and the Source Engine for ages. Well, no
need to worry any longer, in this tutorial n0Face and Patrick “Nauz”
Holetzky, two modders, modeling for the HL2 modfication called
Zeitgeist, will explain you the workflow for Maya 2011 to a source game
step by step.
What you should already have:
- Maya 2012 or Latest version (The student/ trial version will do aswell)
- run Source SDK and the game you want to create a model for atleast
once (refer to this list for all games that include the Source SDK
http://store.steampowered.com/search/?sort_by=Price&sort_order=ASC&category1=998&category2=16)
- Patience
Overview:
- 1.1. Pralls .smd in- /exporter
- 1.2. Creating a correct folder hierachy
- 1.3. Basic settings in maya
- 2.1. Orientation of normals
- 2.2. Assigning of materials
- 2.4. Creating a physics model
- 2.5. Preparing your model for export/ Layers
- 2.6. Exporting the model
- 3.1. Setting up ConTEXT
- 3.2. Compile
- 3.3. Create a .vtf texture
- 3.4. Create a .vmt texture
1. Beginner: Setting up Maya
1.1. Pralls .smd in- /exporter
To export .smd files for the model compiler of source, you’ll have to
copy and paste some files into the Maya 2011 folder placed in your
documents.
For Windows XP user the
[...]\maya\2011\ folder should be somewhere similiar to this:
[...]\Documents and Settings\your_windows_username\My Documents\maya\2011\
Windows 7:
[...]\Users\your_windows_username\Documents\maya\2011\

Found it? Let’s get started!
First of you need to copy the files from
[...]\Steam\steamapps\your_steam_name\sourcesdk\maya\4.5
and paste them into your
[...]\maya\2011\ folder.
Next head over to
http://mitglied.multimania.de/prallvamp/ and download this file:
“Half Life 2 exporter v.2.5 for Maya 4-8 by Prall”
again, paste them into
[...]\maya\2011\. and always choose “Yes” when you’re asked about overriding.
////Maya 2011 and 2012 users only
In Maya 2011, Prall’s exporter GUI is broken. To fix it, grab this file
www.holetzky.de/smdOptionWindow.mel
(Right Click and choose “save as” smdOptionWindow.mel, make sure you do
NOT
save it as a .txt file! To do so, make sure you change “Save type as:
Text Document” to “Save type as: All documents” in the saving dialogue)
Place it into
[...]\maya\2011\scripts\
////End Maya 2011 and 2012 User only
////Maya 2012 (and possibly 2013) users only
It appears that one of the files (FileMenu.mel) gets overwritten with
a not working old FileMenu.mel when you follow these steps, so you will
receive the message
// Error: Cannot find procedure “NewProject”.
whenever you try to create a new project via Maya.
UPDATE DECEMBER 2013
Patrick Barnum pointed out, that the FileMenu.mel hotfix below didnt
work for him and sent me a working hotfix for him, so you may want to
try the following first
// Copyright (C) 1997-2013 Autodesk, Inc., and/or its licensors.

// All rights reserved.

//

// The coded instructions, statements, computer programs, and/or related

// material (collectively the "Data") in these files contain unpublished

// information proprietary to Autodesk, Inc. ("Autodesk") and/or its licensors,

// which is protected by U.S. and Canadian federal copyright law and by

// international treaties.

//

// The Data is provided for use exclusively by You. You have the right to use,

// modify, and incorporate this Data into other products for purposes authorized

// by the Autodesk software license agreement, without fee.

// THE SOFTWARE IS PROVIDED "AS IS", WITHOUT WARRANTY OF ANY KIND. AUTODESK

// DOES NOT MAKE AND HEREBY DISCLAIMS ANY EXPRESS OR IMPLIED WARRANTIES

// INCLUDING, BUT NOT LIMITED TO, THE WARRANTIES OF NON-INFRINGEMENT,

// MERCHANTABILITY OR FITNESS FOR A PARTICULAR PURPOSE, OR ARISING FROM A COURSE

// OF DEALING, USAGE, OR TRADE PRACTICE. IN NO EVENT WILL AUTODESK AND/OR ITS

// LICENSORS BE LIABLE FOR ANY LOST REVENUES, DATA, OR PROFITS, OR SPECIAL,

// DIRECT, INDIRECT, OR CONSEQUENTIAL DAMAGES, EVEN IF AUTODESK AND/OR ITS

// LICENSORS HAS BEEN ADVISED OF THE POSSIBILITY OR PROBABILITY OF SUCH DAMAGES.
//

// Creation Date:  Nov 17 1996

//

//  Procedure Name:

//      FileMenu

//

//  Description:

// This procedure creates the main menubar File menu.

//

//  Input Arguments:

//      None

//

//  Return Value:

//      None.

//

global proc forceSavePreferences()

// Removed for Maya 3.0 but could still be on people's shelves

{

	warning (uiRes("m_FileMenu.kForceSavePrefs"));

}


global proc FileMenu_SaveItem()

//

// If the current file is named, save it.  If it

// is still untitled, then bring up the Save As

// dialog.

//

{

	string $sceneName = `file -q -sceneName`;


	// Get the name of the scene File.

	if ( size($sceneName) == 0 ) {

 // Then the name can't be set.

 projectViewer SaveAs;

	// bug fix 89970 file save

	} else if ((`file -q -amf`) || (`file -q -ex` == 0)) {

 int $incrementalSave = false;

 if(`optionVar -exists isIncrementalSaveEnabled`)

 $incrementalSave = `optionVar -q isIncrementalSaveEnabled`;

 if ( $incrementalSave ) {

 // Save the scene using the Incremental Save feature.

 //

 incrementalSaveScene;

 } else {

 string $compressedSave = 0;

 string $preserveName = 0;


 string $cmd = "file -save";

 if(`optionVar -exists isCompressedSaveEnabled`)

 $compressedSave = `optionVar -q isCompressedSaveEnabled`;


 if ($compressedSave == 1 )

 {

 $cmd = $cmd + " -compress";

 }


 if(`optionVar -exists isCompressedPreserveName`)

 $preserveName = `optionVar -q isCompressedPreserveName`;


 if ($preserveName == 1 )

 {

 $cmd = $cmd + " -preserveName";

 }

 evalEcho($cmd);

 }

	} else {

 warning (uiRes("m_FileMenu.kNoChangesToSave"));

	}

}


global proc buildRecentProjectsMenu()

{

	string $RecentProjectsList[];

	string $localList[];

	int $i;

	int $nNumItems;

	int $nNumItemsToBeRemoved;

	int $RecentProjectsMaxSize;


	if (!`optionVar -exists "RecentProjectsList"`) return;


	// get the list

	$RecentProjectsList = `optionVar -query "RecentProjectsList"`;

	$nNumItems = size($RecentProjectsList);

	$RecentProjectsMaxSize = `optionVar -query "RecentProjectsMaxSize"`;


	// check if there are too many items in the list

	if ($RecentProjectsMaxSize < $nNumItems)

	{

 //if so, truncate the list

 $nNumItemsToBeRemoved = $nNumItems - $RecentProjectsMaxSize;


 //Begin removing items from the head of the array (least recent project in the list)

 for ($i = 0; $i < $nNumItemsToBeRemoved; $i++)

 {

 optionVar -removeFromArray "RecentProjectsList" 0;

 }

 $RecentProjectsList = `optionVar -query "RecentProjectsList"`;

 $nNumItems = size($RecentProjectsList);

	}


	// first, check if we are the same.

	$localList = `menu -query -itemArray FileMenuRecentProjectItems`;

	if ($nNumItems == size($localList))

	{

 for ($i = 0; $i < $nNumItems; $i++)

 {

 string $label = `menuItem -query -label $localList[$i]`;

 if ($label != toNativePath($RecentProjectsList[$nNumItems-$i-1]))

 break;

 }

 if ($i == $nNumItems) return;

	}


	// we are not the same, so start over.

	menu -edit -deleteAllItems  FileMenuRecentProjectItems;

	setParent -menu FileMenuRecentProjectItems;

	for ($i = 0; $i < $nNumItems; $i++)

	{

 string $cmd = "setProject \"" + $RecentProjectsList[$nNumItems-$i-1] + "\"";

 string $label = toNativePath($RecentProjectsList[$nNumItems-$i-1]);

 menuItem -label $label -command $cmd;

	}

}


global proc openRecentFile( string $file, string $fileType )

{

	global string $gv_operationMode;

	$gv_operationMode = "Open";

	pv_performAction($file, $fileType);

	checkForUnknownNodes();

}


global proc  buildRecentFileMenu(string $parentMenu)

{

	string $RecentFilesList[];

	string $RecentFilesTypeList[];

	string $localList[];

	int $i;

	int $nNumItems;

	int $nNumItemsToBeRemoved;

	int $RecentFilesMaxSize;


	if (!`optionVar -exists "RecentFilesList"`) return;


	// get the list

	$RecentFilesList = `optionVar -query "RecentFilesList"`;

	$nNumItems = size($RecentFilesList);

	$RecentFilesMaxSize = `optionVar -query "RecentFilesMaxSize"`;


	// check if there are too many items in the list

	if ($RecentFilesMaxSize < $nNumItems)

	{

 //if so, truncate the list

 $nNumItemsToBeRemoved = $nNumItems - $RecentFilesMaxSize;


 //Begin removing items from the head of the array (least recent file in the list)

 for ($i = 0; $i < $nNumItemsToBeRemoved; $i++)

 {

 optionVar -removeFromArray "RecentFilesList" 0;

 }

 $RecentFilesList = `optionVar -query "RecentFilesList"`;

 $nNumItems = size($RecentFilesList);

	}


	// The RecentFilesTypeList optionVar may not exist since it was

	// added after the RecentFilesList optionVar. If it doesn't exist,

	// we create it and initialize it with a guest at the file type

	if ($nNumItems > 0 )

	{

 if ( !`optionVar -exists "RecentFilesTypeList"`)

 {

 initRecentFilesTypeList( $RecentFilesList );

 }

 $RecentFilesTypeList = `optionVar -query "RecentFilesTypeList"`;

	}


	// first, check if we are the same.

	$localList = `menu -query -itemArray $parentMenu`;

	if ($nNumItems == size($localList))

	{

 for ($i = 0; $i < $nNumItems; $i++)

 {

 string $label = `menuItem -query -label $localList[$i]`;

 if ($label != toNativePath($RecentFilesList[$nNumItems-$i-1]))

 break;

 }

 if ($i == $nNumItems) return;

	}


	// we are not the same, so start over.

	menu -edit -deleteAllItems  $parentMenu;

	setParent -menu $parentMenu;

	for ($i = 0; $i < $nNumItems; $i++)

	{

 string $cmd = ( "openRecentFile(\"" + $RecentFilesList[$nNumItems-$i-1] + "\", " +

 "\"" + $RecentFilesTypeList[$nNumItems-$i-1] + "\")" );


 string $label = toNativePath($RecentFilesList[$nNumItems-$i-1]);

 menuItem -label $label -command $cmd;

	}

}


//

//  Procedure Name:

// buildIncrementalSaveMenu

//

//  Description:

//      Build the sub menu in the file menu that lists the recent incremental

// backups that exist for the current scene

//

//  Input Arguments:

//	None.

//

//  Return Value:

//	None.

//

global proc buildIncrementalSaveMenu()

{

	string $scenePath = `file -q -sceneName`;


	if ( size( $scenePath ) == 0 ) return;


	string $pathInfo[] = incrementalSaveProcessPath( $scenePath );

	string $scenePath = $pathInfo[0];

	string $sceneExtension = $pathInfo[2];

	string $sceneNamePrefix = $pathInfo[3];

	string $incrementDirName = $pathInfo[5] + "/";


	string $incrementDirPath = $scenePath + $incrementDirName;


	// Get a list of all files in the backup directory

	//

	string $existingIncrements[] = `getFileList

 -folder $incrementDirPath

 -filespec ($sceneNamePrefix + ".*" + $sceneExtension)`;


	// Make sure that they are sorted

	//

	$existingIncrements = sort( $existingIncrements );


	int $numIncrementals = `optionVar -q "RecentBackupsMaxSize"`;


	// Build the menu

	//

	int $last = size( $existingIncrements );

	int $first = max( 0, $last - $numIncrementals );

	menu -e -deleteAllItems FileMenuRecentBackupItems;

	setParent -menu FileMenuRecentBackupItems;

	for ( $i = $first; $i < $last; $i++ ) {

 string $cmd = "file -f -open \"" + $incrementDirPath + $existingIncrements[$i] + "\"";

 string $sceneName = `match "[^/]+$" $existingIncrements[$i]`;

 menuItem -l $sceneName -c $cmd;

	}

}


//

//  Procedure Name:

// hasIncrementalSaves

//

//  Description:

//      Returns true if the current file has some automatic backups

//

//  Input Arguments:

// None.

//

//  Return Value:

// None.

//

global proc int hasIncrementalSaves()

{

	int $result = 0;


	string $scenePath = `file -q -sceneName`;


	if ( size( $scenePath ) > 0 ) {

 string $pathInfo[] = incrementalSaveProcessPath( $scenePath );

 string $scenePath = $pathInfo[0];

 string $sceneExtension = $pathInfo[2];

 string $sceneNamePrefix = $pathInfo[3];

 string $incrementDirName = $pathInfo[5] + "/";


 string $incrementDirPath = $scenePath + $incrementDirName;


 // Get a list of all files in the backup directory

 //

 string $existingIncrements[] = `getFileList

 -folder $incrementDirPath

 -filespec ($sceneNamePrefix + ".*" + $sceneExtension)`;


 $result = ( size( $existingIncrements ) > 0 );

	}


	return $result;

}


//

//  Procedure Name:

// checkMainFileMenu

//

//  Description:

//      Disables or enables the recent files, backups, and projects

// menus depending on whether they have contents.

//

//  Input Arguments:

// None.

//

//  Return Value:

// None.

//

global proc checkMainFileMenu()

{

	$enable = false;

	if (`optionVar -exists "RecentFilesList"`)

	{

 if (`optionVar -arraySize "RecentFilesList"` > 0) $enable = 1;

	}

	menuItem -e -enable $enable FileMenuRecentFileItems;


	$enable = hasIncrementalSaves();

	menuItem -e -enable $enable FileMenuRecentBackupItems;


	$enable = false;

	if (`optionVar -exists "RecentProjectsList"`)

	{

 if (`optionVar -arraySize "RecentProjectsList"` > 0) {

 $enable = true;

 }

	}

	menuItem -e -enable $enable FileMenuRecentProjectItems;


	// Create "Send To" menu items for one-click

	// interop with available applications.

	//

	buildSendToSubMenus;

}


global proc buildFileMenu()

{

	global string $gMainFileMenu;

	if( `menu -q -ni $gMainFileMenu` != 0 ) {

 //

 //	Menu is built already - just return

 //

 return;

	}


	menu -e -postMenuCommand checkMainFileMenu $gMainFileMenu;


	int $dimWhenNoSelect = 0;


	setParent -m $gMainFileMenu;

 menuItem -label (uiRes("m_FileMenu.kNewScene"))

 -annotation (getRunTimeCommandAnnotation("NewScene" ))

 -command ("NewScene") newProject;

 menuItem -optionBox true

 -annotation (getRunTimeCommandAnnotation("NewSceneOptions"))

 -command ("NewSceneOptions")

 newFileOptions;


 menuItem -label (uiRes("m_FileMenu.kOpenScene"))

 -annotation (getRunTimeCommandAnnotation("OpenScene"))

 -command ("OpenScene") openProject;

 menuItem -optionBox true

 -annotation (getRunTimeCommandAnnotation("OpenSceneOptions"))

 -command ("OpenSceneOptions")

 openFileOptions;


 menuItem -divider true;


 menuItem -label (uiRes("m_FileMenu.kSave"))

 -annotation (getRunTimeCommandAnnotation("SaveScene"))

 -command ("SaveScene") saveItem;

 menuItem -optionBox true

 -annotation (getRunTimeCommandAnnotation("SaveSceneOptions"))

 -command ("SaveSceneOptions")

 saveOptions;


 menuItem -l (uiRes("m_FileMenu.kSaveAs"))

 -annotation (getRunTimeCommandAnnotation("SaveSceneAs"))

 -command ("SaveSceneAs") saveAsItem;

 menuItem -optionBox true

 -annotation (getRunTimeCommandAnnotation("SaveSceneAsOptions"))

 -command ("SaveSceneAsOptions")

 saveAsOptions;


        // For the menu item label, QT takes "&&"  as the escape charaters of "&".

        // But this only works under Windows and Linux. On Mac, using one "&" is ok.

        if (`about -mac`) {

            menuItem -label (uiRes("m_FileMenu.kIncrementAndSaveMac"))

        -annotation (getRunTimeCommandAnnotation("IncrementAndSave"))

	            -command ("IncrementAndSave");

        } else {

            menuItem -label (uiRes("m_FileMenu.kIncrementAndSave"))

        -annotation (getRunTimeCommandAnnotation("IncrementAndSave"))

	            -command ("IncrementAndSave");

        }


 menuItem -label (uiRes("m_FileMenu.kArchive"))

 -annotation (getRunTimeCommandAnnotation("ArchiveScene"))

 -command ("ArchiveScene") archiveItem;


        // For Maya LT, we disable references.

        // Currently, the archive option box contains only reference-related

        // options. So we disable what would be an empty option box.

        // If non-referencing options are added for the archive command, then

        // the option box should be re-enabled.

 menuItem -optionBox true

 -annotation (getRunTimeCommandAnnotation("ArchiveSceneOptions"))

 -command ("ArchiveSceneOptions")

 archiveSceneOptions;


 menuItem -ecr false -label (uiRes("m_FileMenu.kSavePrefs"))

 -annotation (getRunTimeCommandAnnotation("SavePreferences"))

 -command ("SavePreferences");


 menuItem -divider true;


 menuItem -l (uiRes("m_FileMenu.kOptimize"))

 -annotation (getRunTimeCommandAnnotation("OptimizeScene"))

 -command ("OptimizeScene") cleanUpProject;

 menuItem -optionBox true

 -annotation (getRunTimeCommandAnnotation("OptimizeSceneOptions"))

 -command ("OptimizeSceneOptions")

 cleanUpSceneOptions;


 menuItem -divider true;


 menuItem -label (uiRes("m_FileMenu.kImport"))

 -annotation (getRunTimeCommandAnnotation("Import"))

 -command ("Import") importFileItem;

 menuItem -optionBox true

 -annotation (getRunTimeCommandAnnotation("ImportOptions"))

 -command ("ImportOptions")

 importFileOptions;


 menuItem -label (uiRes("m_FileMenu.kExportAll"))

 -annotation (getRunTimeCommandAnnotation("Export"))

 -command ("Export") exportAllFileItem;

 menuItem -optionBox true

 -annotation (getRunTimeCommandAnnotation("ExportOptions"))

 -command ("ExportOptions")

 exportAllFileOptions;


 menuItem -label (uiRes("m_FileMenu.kExportSelection"))

 -annotation (getRunTimeCommandAnnotation("ExportSelection"))

 -command ("ExportSelection") exportActiveFileItem;

 menuItem -optionBox true

 -annotation (getRunTimeCommandAnnotation("ExportSelectionOptions"))

 -command ("ExportSelectionOptions")

 exportActiveFileOptions;

 if( $dimWhenNoSelect )

 dimWhen -false SomethingSelected exportActiveFileItem;


 menuItem -divider true;

// PBARNUM

 menuItem -label "Export SMD..."

 -annotation "Export SMD: Save SMD associated with this file"

 -command ("smdExportMenuItem")

 smdExportMenu;

 menuItem -optionBox true

 -annotation "SMD Option Box"

 -label "SMD Option Box"

 -command ("smdOptionWindow")

 smdExportOptions;


 menuItem -label "Export VTA..."

 -annotation "Emport VTA: emport VTA format file"

 -command ("vtaExport")

 vtaExport;


 menuItem -label "Import SMD..."

 -annotation "Import SMD: import SMD format file"

 -command ("smdImport")

 smdImport;


 menuItem -label "Import SMD Animation"

 -annotation "Import SMD: import SMD format file"

 -command ("smdImportani")

 smdImportani;


 menuItem -label "Import From Hammer..."

 -annotation "Import From Hammer: import DXF exported by Hammer"

 -command ("wcImport")

 wcImport;


 menuItem -label "Compile QC File"

 -annotation "Compile QC: run studiomdl on the QC file for current project"

 -command ("compileQCFile")

 qcFileExportMenu;


// menuItem -label "SourceSafe"

// -annotation "SourceSafe: check file in and out of VSS"

// -command ("if (`vssStatus`){print `vss -f -i`;} else {print `vss -f -o`;}vssStatus;")

// -cb 0

// vssMenuItem;


 menuItem -divider true;

// PBARNUM

 menuItem -label (uiRes("m_FileMenu.kExportOfflineFile"))

 -annotation (getRunTimeCommandAnnotation("ExportOfflineFile"))

 -command ("ExportOfflineFile") exportEditsFileItem;

 menuItem -optionBox true

 -annotation (getRunTimeCommandAnnotation("ExportOfflineFileOptions"))

 -command ("ExportOfflineFileOptions")

 exportEditsFileOptions;

 if( $dimWhenNoSelect )

 dimWhen -false SomethingSelected exportEditsFileItem;


 menuItem -label (uiRes("m_FileMenu.kAssignOfflineFile"))

 -annotation (getRunTimeCommandAnnotation("AssignOfflineFile"))

 -command ("AssignOfflineFile") assignOfflineFileItem;

 menuItem -optionBox true

 -annotation (getRunTimeCommandAnnotation("AssignOfflineFileOptions"))

 -command ("AssignOfflineFileOptions")

 assignOfflineFileOptions;

 if( $dimWhenNoSelect )

 dimWhen -false SomethingSelected assignOfflineFileItem;


 menuItem -divider true;


 menuItem -label (uiRes("m_FileMenu.kViewImage"))

 -annotation (getRunTimeCommandAnnotation ("ViewImage"))

 -command ("ViewImage")

 viewFrameItem;


 menuItem -label (uiRes("m_FileMenu.kViewSequence"))

 -annotation (getRunTimeCommandAnnotation ("ViewSequence"))

 -command ("ViewSequence")

 viewSequenceItem;


 menuItem -divider true;


 menuItem -label (uiRes("m_FileMenu.kCreateReference"))

 -annotation (getRunTimeCommandAnnotation("CreateReference"))

 -command ("CreateReference") referenceFileItem;

 menuItem -optionBox true

 -annotation (getRunTimeCommandAnnotation("CreateReferenceOptions"))

 -command ("CreateReferenceOptions")

 referenceFileOptions;


 menuItem -label (uiRes("m_FileMenu.kReferenceEditor"))

 -annotation (getRunTimeCommandAnnotation("ReferenceEditor"))

 -command ("ReferenceEditor")

 residentFileItem;


 menuItem -divider true;


 menuItem -label (uiRes("m_FileMenu.kProjectWindow"))

 -annotation (getRunTimeCommandAnnotation("ProjectWindow"))

 -command ("ProjectWindow") projectWindowFileItem;


 menuItem -label (uiRes("m_FileMenu.kSet"))

 -annotation (getRunTimeCommandAnnotation("SetProject"))

 -command ("SetProject") setProjectFileItem;


 // add recent file and project lists

 menuItem -subMenu true -l (uiRes("m_FileMenu.kRecentFiles"))

  -postMenuCommand "buildRecentFileMenu FileMenuRecentFileItems" FileMenuRecentFileItems;

 setParent -m ..;


 menuItem -subMenu true -l (uiRes("m_FileMenu.kRecentIncrements"))

 -postMenuCommand "buildIncrementalSaveMenu" FileMenuRecentBackupItems;

 setParent -m ..;


 menuItem -subMenu true -l (uiRes("m_FileMenu.kRecentProjects"))

 -postMenuCommand "buildRecentProjectsMenu" FileMenuRecentProjectItems;

 setParent -m ..;


 if (!`about -mac`) {

 menuItem -divider true;


 // Do not add any other code to the quit or you will not

 // have it executed for some types of quitting - like

 // quitting through the command language or by double-clicking

 // the main Maya window.

 //

 menuItem -l (uiRes("m_FileMenu.kExit"))

 -annotation (uiRes("m_FileMenu.kExitAnnot"))

 -command ("Quit") quitItem;


 if (`about -nt`)

 {

 menuItem -e -mn "O" openProject;

 menuItem -e -mn "S" saveItem;

 menuItem -e -mn "A" saveAsItem;

 menuItem -e -mn	"x" quitItem;

 }

 }


	checkMainFileMenu();

}


// OneClick selection setting options

//

global proc int oneClickDefaultSendPreviousSelection()

{

	global int $gOneClickDefaultSendPreviousSelection = 0;

	return $gOneClickDefaultSendPreviousSelection;

}


global proc int oneClickDefaultSendEntireScene()

{

	global int $gOneClickDefaultSendEntireScene = 0;

	return $gOneClickDefaultSendEntireScene;

}


{

	global string $gMainFileMenu;

	global string $gMainWindow;


	menu -p $gMainWindow -l (uiRes("m_FileMenu.kFile"))

 -allowOptionBoxes true -tearOff true

 -postMenuCommand "buildFileMenu();"

 -familyImage "menuIconFile.png" $gMainFileMenu;
	setParent -m ..;

}
Grab this and put it into your scripts folder, overwrite the old file
If it doesnt work, you may want to try the hotfix that was sent by Shawn Michael Maldonado to me!
www.holetzky.de/FileMenu.mel
////End Maya 2012 and 2013 User only
Time to run Maya and check if you’re still with me!
Your Maya file menu should contain an “export smd…” option now When
you click on the square right of it, your menu should be somewhat like
this:

1.2. Creating a correct folder hierachy
In case you want the export script to find your model and textures,
you will need to make sure you create a specific folder structure for
each of your Maya projects.
Create a new folder in your
[...]\maya\projects\ folder, call the folder for example “Tutorial_Maya_2011_to_Source”.
This folder needs to contain a folder called “scenes”, one called
“model_sources” and also one called “materialsrc”. The materialsrc
should also contain a folder called “models”.
The hierachy that will bother you for the rest of your Maya-life should look like this:

When done, in Maya, go to
File -> Project -> Set and choose your “Tutorial_Maya_2011_to_Source” folder.
1.3 Basic settings in maya
Per default, Maya’s up-axis is set to Y. However, in source the up-axis is Z. To avoid headaches later, in Maya go to
Window -> Settings/ Preferences -> Preferences -> Settings and change the Up axis from Y to Z.

While enjoying your stay in the Maya settings, you should also change the
Working Units -> Linear option to centimeter, which is directly placed under your the up axis setting.
That should make 1 unit in Maya equal 1 unit in Source. (1 unit = 1 inch = 2,54cm)
Hit save and restart Maya to apply the changes.
As a game modeler, you may want to have an eye on your Polycount.
To see it permantly, go to
Display -> Head Up Display and check “Poly Count”.
Great! Your Maya is now setup to create awesome models for Source!
2. Beginner: Working in Maya
Now it is time to do some real work. We are going through the process
of creating a simple cube, add a texture and a physic mesh. Then we
will organize our scene to prepare it for the exportation.
You can download the Maya project created in this the following tutorial here:
http://www.northcapestudios.com/tutorial/Tutorial_Maya_2011_to_Source.rar
Well, lets get started.
2.1. Create a simple base mesh
Create a simple cube:
Assuming you are familiar with Maya, this should be an easy task for you.
If you are not familiar with Maya yet, go to Create in the Main Menu bar, then
Polygonal Primitives and click on Cube.

…tadaa, well nothing worldcrushing, but keep in mind, creating the
base mesh is normally one of the most time intense steps in your working
process.
For our purpose lets scale our cube up to about 25 units.
Normal Orientation:
To show you another issue with the source engine, turn off the your two sided lighting, to do so go in your
View panel and uncheck
Lighting -> Two Sided Lighting.
Now scale your mesh to about -25 units and freeze its transformations. (
Main Menu bar -> Modify -> Freeze Transformations )

You will see your mesh turning black. Why? Good question!
By default, the normals of each face point outwards, but because of
the scaling into the negative direction you flipped the normals inside.
Unchecking the “Two Sided Lighting” tells Maya to light only the normal
side of the faces and so the outer side turns black.
This case occurs sometimes when you are extruding, extracting or using some other Maya tools.
The problem is that the source engine naturally renders only one
sided, which means the black side would turn transparent in source.
To flip the normals back outside, select single faces, in component
mode, or the whole object. Then switch the Main Menu bar to Polygons

go to
Normals -> Reverse, this will flip the selected faces. And now your cube should return to a gray color.
 Be sure to check the orientation of the normals, before exportation or animation.
Now we have a real boring looking cube, so lets go on and add some color in the chapter.
2.2. Assigning of materials
UV-Mapping:
Before we can add a texture to our cube, we have to unfold the cube.
This is something everyone has done at least once in school, where you
build up a cube by cutting a paper shape of a T an folding it to get in a
three dimensional shape.
Unfolding a polygonal mesh is called UV-Mapping, explaining this in detail would exceed the scope of this tutorial.
There are a lot of tutorials around the web about UV-Mapping so just google it.
For complex models, I would recommend this tutorial for example http://www.3dtotal.com/team/Tutorials/human_anatomy/human_01.php
You can find the tools for UV-Mapping in the
Polygons Main Menu bar under
Create UVs and
Edit UVs.
The UV Texture Editor can be found under
Window -> UV Texture Editor.
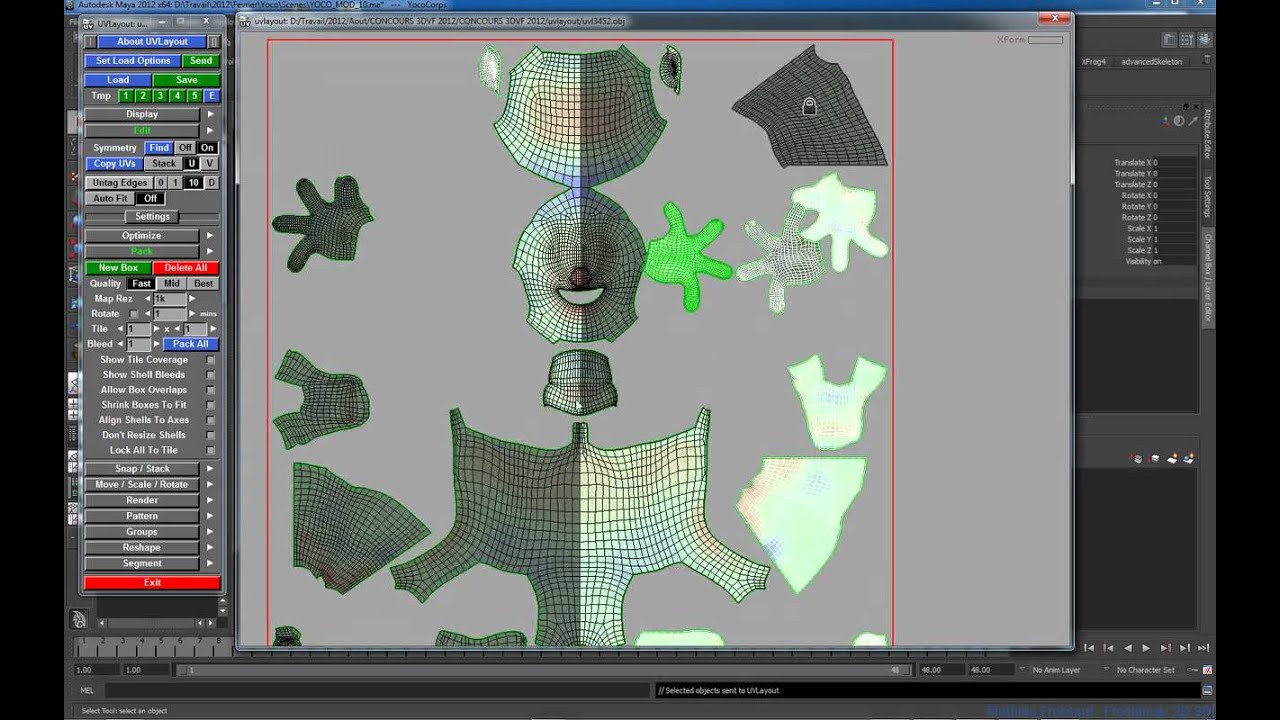
Well, my UV-Map looks like this:

The default UV map for cubes looks similiar. so you can leave it the way it is for our simple model.
The next step is to create a texture based on the model’s UV-Map.
Commonly this is a task you would do in Photoshop but you can use every
other picture editing program you prefer, e.g. Gimp or even Windows
Paint.
My sample texture looks like this, it is nothing fancy, just simply Mario and his friends. I usually save my images as a
.tga.
Important is the path where you save your texture, because the exporter
will put this path in the smds. Your model textures should be placed in
the [...]/materialsrc/models/[...] folder. For Example: in my case I
put the texture in [...]/materialsrc/models/tutorial_cube_texture.tga
the corresponding path in which source will search for the .vmt will be
[...]/modname/materials/models/tutorial_cube_texture.vmt.

Keep your texture in a size of power of two, because source will get problems with other formats.
(e.g.
256*256,
512*512,
256*512, etc.)
Assigning material:
The next step is to apply the created texture to our cube, to do so first clean up your mesh, by deleting its history.
This will delete all the nodes of your mesh except the shape node.
(If your going to animate, beware!
Because you would also delete the skinCluster node, that binds your
bones to your mesh. In this case, instead delete the Non-deformer
history only)
To delete the history select the mesh, go in the Main Menu bar to
Edit -> Delete by Type -> History.
Now the Attribute Editor should look a lot cleaner when your cube is selected.
To add a Material to the cube which is exportable,
right click and hold the cube. A menu should appear. In that context menu, head down to
Assign new Material… and left click.
A new Window will pop up.

Search for the
PhongE Shader which is the only shader that the export script will recognize.
The
Attribute Editor should open, if not press Ctrl+A to open it.
There will be a
phongE1 tab, which contains all our attributes for this material.
You can edit those and experiment to get different results, but all
those attributes won’t be exported, but are more or less available
through settings in the .vmt file, but this will be explained in
3.5 Create .vmt file.
The next step is to assign a File node to the PhongE Shaders color
channel, i.e. to assign our previously created texture to the cube.
To do so, follow these steps:
Next to the Color channel is a checkered button, hit it.

In the opening window hit
File, which is the File node we are looking for.
Notice how there is a new tab in the Attribute Editor called
file1 in addition there is an
place2dTexture1 tab.
In the
file1 tab you can browse for your texture and
add it this way to the cube. If you hit 6 on your keyboard, while being
in the viewport, the texture will appear.

If you are working with tileable textures the place2dTexture1 tab
might become interesting. For short, in this tab you can change settings
about the offset, rotation and repetition of the texture.
Before we head to the next chapter, there are some things I would like to mention:
When you got a mesh with more than one texture, which is possible by assigning the shader to single faces, do
NOT work with more than three textures per mesh/object, because Source doesn’t support that.
If you are working with multiple objects in one project you can have
more than three textures, e.g. when you create a lantern, you could
separate the upper part from the lower and assign every piece an own
texture.
So now lets go on to the next chapter, creating the physic mesh.
2.3. Creating a physics model
It is half time, we created the mesh, checked the orientation of the normals and assigned a crappy texture to the cube.
Now it is time to add a collision model to your model!
If you would skip this step and export the model as it is and place
it in a map, start the game and run towards your model, you could run
through it.
This so called physic model is an invisible part of the model which
allows the user to interact with it e.g. to grab it, push it or destroy
it.
The physic mesh itself is a real simplified, convex version of the base mesh.
For more information about the convex shape of a physic mesh take a
look at this: http://en.wikipedia.org/wiki/Convex_and_concave_polygons
When you are creating a physic mesh try to keep the polygon count to a
minimum because too complex physic meshes will be a real pain in the
ass for Source to calculate and would decrease your performance
drastically.
Another thing is that you have to assign a PhongE to the physic mesh even through it’s not visible in game.
If you wouldn’t, the physic mesh is going to be non existent in your
final model. So just apply one of the PhongE you used for your base
mesh.
Ok, enough boring theory lets create our physic mesh.
Create the simple cubic physic mesh:
Of course you could create a new cube and add the texture to it and use it as the physic mesh.
In our case it is more simple, just duplicate the existing cube and you will be mostly done.
To duplicate the cube just select our cube and press Ctrl+D or go to the
Main Menu bar -> Edit -> Duplicate. Just like the Command Line on the bottom indicates you got a second cube.

Just one step left and your done with this chapter. Softening the
edges of the collision model. This will interpolate the edges normals,
which will result in a softer look. But in this case it is necessary, so
source understands the mesh in the correct way,
so do NOT forget this!
To soft the edges of our second cube select it, if you are not capable to select it in the viewport, open the Outliner (
Main Menu bar -> Windows -> Outliner) and select the pCube2 there.
Then go to
Polygons Main Menu bar -> Normals -> Soften Edge.

You will see the difference when your done.
Well this is it. We’re done with our model. The only thing left is setting up the layers for the export.
2.4 Preparing your model for export
This step is needed to tell the exporter where he can find the base mesh and the physics mesh.
Create and add to the reference layer:
To tell Pralls exporter where to find the base mesh, we are going to create a reference layer.
To do so press the little button in the lower right corner which
creates an empty layer. Double click it and name it “reference” (this is
important, it has to be this name), hit save.

Now add the base mesh, which should be called “pCube1” in the
Outliner, to the reference layer. Select it, right click the reference
layer and hit Add selected Objects, now the base mesh is part of the
reference layer.
 Create and add to the physics layer:
Now to tell the exporter about the physics mesh, create a new layer called “physics” and add the physic mesh to it.
Another way is, to select the physic mesh first and “Create a new
layer and assign selected Objects” in one step. To do so hit the button
next to the Create a new layer.
 Add the correct Memberships:
Since Maya 2008 this step is necessary, don’t ask me why they did
this, because I never got problems with memberships, but they did it.
Open the membership editor, to do so right click one of the layers and hit Membership.
A new window pops up called the Relationship Editor, there are two
columns, the left is for the layers and the right lists all objects in
your scene just like the Outliner does.
Select the physics layer in the left column and expand the pCube2 node, by clicking the +.
It should look like this:

The problem is, that the pCubeShape2 isn’t part of the physics layer,
in this state the exporter wouldn’t export anything. To change this we
add the Shape nodes to the corresponding layers.
Just click on the pCubeShape2 node an it will turn blue. Now the pCube2 and the pCubeShape2 nodes are seleted.
Repeat this for the reference layer, so it looks like this:

We are finally done! Now we can export our model. Took long enough to get here!
2.5. Exporting the model
Open up the SMD Export options, go
Main Menu bar -> File -> Export SMD… and klick on the little square.
Export tab:
The settings should look for our cube like this:

The option export Animation smds is only needed when you are working
with animations which is not the case now, so we’ll leave it unchecked.
Export Reference smd from Layer “reference” and export Physics smd from Layer “physics” are self explainable and important.
The 1 frame idle animation is also needed or the model wouldn’t
appear ingame, it is the all time standard animation if you don’t have
others.
Export Textures writes the applied textures in the smd. Generating a
QC is not necessary but makes the start a little bit easier, because you
don’t have to write the whole thing from scratch, more about smds later
on.
Path Settings tab:
In the second tab you can edit the folders where the smds and the
textures are placed. I got used to the default paths, which are shown in
the next pictures. The texture Path is irrelevant cause here the
exporter is a little bit damaged and only creates a .txt.
As you can see the exporter is going to create three smds and one qc
file in your model_sources folder. The names of those smds explains
there usage, more or less. The Tutorial_Maya_2011_to_Source.qc will
include the compilation settings (more later in chapter 3), the
Tutorial_Maya_2011_to_Source.smd contains the information about the base
mesh and his texture. Tutorial_Maya_2011_to_Source_phy.smd contains the
physic mesh and Tutorial_Maya_2011_to_Source_idle.smd the idle
animation. The last file is going to be very small in this case, because
there is no real animation in it, it’s just one frame.
QC_Settings tab:
In the third tab you can make pre adjustments to your qc file, like
Keyvalues, which are about physical behaviour. Surfaceprop settings are
about the behaviour when the object is shot, e.g. when wood is under
fire it emits scales of wood.
Scale modifies the dimensions of the model, which is interesting to increase or decrease the size of the model in a simple way.
The physical weight of an object is described by the Mass attribute, its unit is [kg].
An important option is the Static Prop, which describes if the model
is a static, i.e. it is not influenced by force like gravity or the
impulse of bullets. In this case I will check it.
In the lower part of this tab you have the possibility to add custom
lines to your qc file, I don’t this much because I prefer to work with
ConTEXT.
Animations tab:
In the Animations tab you can add and edit the export of animations
like setting the start and end frame. But exportation of animations will
be part of a later tutorial.
Full Compile:
Check your scene if everything is correct. Check the
normals orientation, the memberships of the layers and your texture
paths. Also check if you can freeze some transformations or delete
history. Save your work.
And now there is only one thing left. Click the damn Full Compile button!!
But beware you are not done yet. In fact Full Compile means that the
exporter creates the smds and qc files but it don’t compile the whole
thing. In previous Maya versions this was possible but not any more.
Okay, now Nauz will take the lead again and will explain you the
basics in compilation and creation of the texture files for source.
3. Beginner: Compiling
If you’re coming from 2.5 Exporing the model, you know that Prall’s
exporter fortunately already provides you with almost all files
that you will need in order to compile your model for the Source Engine.
To find the files created by the export script, head to your model sources folder in your current Maya project.
E.g.
[...]\Tutorial_Maya_2011_to_Source\model_sources is the path where the Cube from this tutorial has been exported to.
Besides three files with the ending .smd, which contain the mesh, animation and texture information, there’s also a
.qc file.
The
.qc file basically is a simple text file, that
tells the Source Compiler (which is called studiomdl.exe and located in
your Source SDK bin folder), what it’s supposed to do with all the .smd
files and how they are related.
Prall’s exporter writes every neccessary command into it, as long as you put a check mark in the export option window.
E.g. if you checked “
export Textures“, the .qc file will contain the command
$cdmaterials models/, because our .tga was placed in
[...]\Tutorial_Maya_2011_to_Source\materialsrc\models\.
If this would be missing, studiomdl.exe wouldn’t know, where in relation to the model files the textures are placed.
But assuming you followed this tutorial, your .qc file contains every information we need, no need for further modifying.
Since it’s a simple text file, you are able to open it with any text editor.
I recommend you using ConTEXT though, a free text editor. It offers an
easy way to compile and see the compiling’s console output.
(otherwise you would need to browse to your studiomdl.exe for every single model or use a batch file everytime)
3.1 Setting up ConTEXT
Where do I get it? Here:
ConTEXT (freeware)
1. After you downloaded it, you should right-click any .qc file you recently made and go to
Properties.
For the “Open with…” option you should browse to “ConTEXT Programmers Editor” and click Ok.
 The settings in ConTEXT
1. Make sure that you can see the “Console Output” window under you’re .qc file.
If you cannot see it, go to the
View-tab and make sure, that “
Console Output” is activated.
2. Now go the
Options-> Environment Options.
Click the
Execute Keys tab.
Click
Add below the white box.
You should be requested to enter extensions now. Type
qc and click Ok.
You’re window should look like this now:

3. Move on by left-clicking on F9.
Following settings are required:
Execute: Paste you’re path to the studiomdl.exe in there.
For me compiling for episode 1 it is
D:\Program Files\Steam\steamapps\your-steam-account\sourcesdk\bin\ep1\bin\studiomdl.exe
Start in:
%p
Parameters:
%n
Hint:
Compile
And turn on the
Capture console output and
Scroll console to the last line options.
You’re final setting should look like this

3.2. Compile
Before you can compile your model, Steam MUST be running.
Also open your Source SDK and make sure you have set it to the game you wish to compile for.
In our example I will choose Half-Life 2, but it will work for every other game aswell.

Now just open the
.qc file
Tutorial_Maya_2011_to_Source.qc with ConTEXT and press
F9.
In the console you can see your model compile log. Notice the files created in your choosen game’s model folder.

Now you might want to check if it worked for you! Open your Model Viewer and open the
tutorial_maya_2011_to_source.mdl, you are likely to see this beautiful purple-black checkered cube.

Time to set up the texture, the final step!
3.3. Create a .vtf texture
Well, at the moment you only have a
.tga texture in your Maya project. Source only accepts images in the
.vtf (valve texture file) format though, which you will have to place in your game or mod folder.
There are several ways to convert a texture into the .vtf format, i personally like the
Photoshop .vtf plugin the most, which you can find here:
http://nemesis.thewavelength.net/index.php?p=39
Since we placed the
.tga texture in
2.2 Assigning of materials in the
[...]\Tutorial_Maya_2011_to_Source\materialsrc\models\ folder,
we now have to place the
.vtf texture into
[...]\materials\models\.
In my case the exact path is
D:\Program Files\Steam\steamapps\your-steam-account\half-life 2\hl2\materials\models\.

3.4. Create a .vmt texture
Now Source wants some information how to use the .vtf texture file.
This is again done by a simple text file, this time with the extension
.vmt (Valve material text).
So go ahead, create a text document next to your .vtf file and give it
the name of your .tga texture + the extension .vmt, make sure its type is not a Text Document as seen below, but instead it should say
VMT File.

Open the .vmt file, for example with ConTEXT, and write in this
“VertexLitGeneric”
{
“$baseTexture” ”models/tutorial_cube_texture.vtf”
}
(NOTE: Blogging software changes the ” ” ” to weird ” or ´´ `´, look at
the screenshots to make sure you get them right (Shift + 2 on german
keyboards, Shift + ‘ on english keyboards)
VertexLitGeneric is the Shader Class you must use for your models, make
sure every .vmt file that descirbes a model textur begins like this.
Furthermore we tell which textur to apply to the model with the
$baseTexture command, of course there are many more commands, but this
will do for your “first time”.
The path after “$baseTexture” could
link to any texture of your choice, it doesn’t have to be named the same
as your initial .tga texture, only the .vmt name has to be identical to
the .tga name.
Again, launch the Model Viewer or press Refresh to see if you mastered the .vmt and .vtf creation successfully: