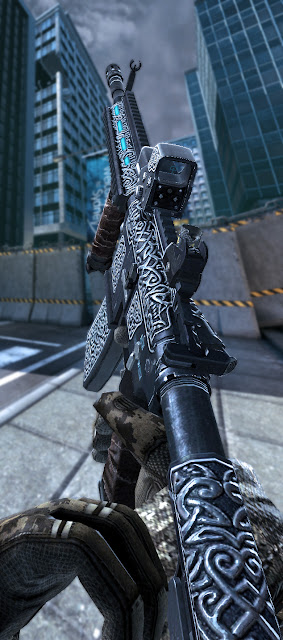
The article describes how to "rip" models and textures of the games using as an
API directx 8, 9, 11 versions, and import ripped models/textures into
3ds max.
Important: if you're an experienced PC user, then your problem may be
only getting properly uv. The rest is easy. However, I specifically
"chewed" ripping process for all users.
Note: The article is designed for users familiar with working in 3ds Max and does not cover detail things such as, for example, texturing objects, setting up materials, etc.
For the conversion process, we need the following tools:
- 3ds Max (i'm using 2009 х86) should work on versions: 2009-2013
- Ninja Ripper v1.1.0 (ripper) Author: blackninja [link]
- ninja_importer v1.3 (3ds max import script) Author: blackninja [download]
1.
Ripper setting. Unpack the archive to any folder. Run the program.
Hide all ripper features «
Extracting all available vertex information of the models (position, all the texture coordinates, normals, weights, BLENDWEIGHT, BLENDINDICES, BINORMAL, TANGENT), indices, textures, shaders. Theoretically all extracted information could be import into the 3D editor!
Support for D3D11, D3D9, D3D8 (processed, however not all methods/techniques, but should work for 95% of all games).
Hide all ripper function description «
Select the game you want to "rip". In the Ripper window click the button '...' to select .exe of the game.
Note: You can add game's .exe by drag-and-drop from explorer window to the ripper window
Choose the mode in which will produce ripring process of the games. Mode depends on which
directx game is running. Modes description:
• No Wrapper - mode in which the ripper will try to run .exe of the
application/game directly, using for ripping only intruder.dll, if this
mode does not work (do not rip) then you need to select one of the
wrapper modes!
• wrapper modes - a modes in which ripper will copy d3dX.dll in to a
folder containing the executable file of the application/game, after
this ripper windows can be closed, then you can start the game from any
location, copied d3dX.dll will automatically clinging into the game.
Thus no longer need to run the ripper himself for this game.
• D3D8 Wrapper - for directx8 games only
• D3D9 Wrapper - for directx9 games only
• D3D11 Wrapper - for directx11 games only
Note:
you need to delete .dll from the game folder manually (if necessary),
ripper configurations is stored in the registry from now on! (the old
version of ripper's settings are stored in the folder with the ripper)
Start the game by pressing the
Run button:
2.
Game rip process. After starting the game and
choose the desired location click on the "rip" button, the default key
is F10. After pressing F10 game will "freeze" for a second, then will
run a little and then "freeze" again for about 5-25 seconds. Duration of
ripping process depends on "quality" of the game and the computer
capacity. During the ripping process in the game folder (where game .exe
is located) will be created folder with models (.rip format) and
textures (.dds format).
Pressing the rip textures button (default F9) will rip only the
textures that will be stored in the same folder with the game's .exe.
You will know when ripping is finished by the continue of the game.
It should also be borne in mind that in some games, ripping process
"hangs" the whole game, ie after ripping and "hangs out" of the game,
you can continue from the same point at which the game "freezes".
However, there are some games that continue running even during ripping
and after the process is finished, you can run into SUV, and your rivals
will be far ahead.
3.
Importing models into 3ds max. Open 3ds max. Menu
MAXScript >
Run Script... choose a script
ninja_importer.ms, window opens:
Hide all importer function description «
- Source select (source selection and the import mode):
- Group - import group files
- Single - import single files
- List File - import files from list (not implemented yet)
- Input Dir/File - import source, the file or folder (depending on the selected mode)
- RIP File Nums - field to enter the file numbers to import (Group mode only), the input format is: 0-15, 589, 67
- Vertex Format (selecting the model building settings):
- Auto - mode to automatically identify groups of data (vertices, normals, uv-coordinates), will work for most games
- Manual - mode for manual definition of groups of data, you needed to import the models of the new games (mostly directx11)
- Position (x,y,z) - fields for enter data defining the position of
the vertices of the model, even in manual mode these parameters in 99%
of games will not change
- Normal (x,y,z) - fields for enter data defining the normals at each vertex of the model (not implemented yet)
- TexCoord (u,v) - fields for enter data defining texture coordinates
of the model, one of the most important parameters. For games, wich
model imports without a proper uv-coordinates, a pair of UV always
choosing by search. At the time is Identified that pairs can not exceed
number 50, that is can be 6-7 or 18-19 or 24-25 or 39-40 etc. In very
rare cases, a pair of uv can be 3-4 or 4-5 or 5-6, which is within the
"normal field of definition", as well as 8-6 or 12-11, which is at odds
with common sense, but may still be.
- Transformations:
- Scale - the scale of the imported model
- Rotate - turn imported model on the selected axis
- Tex.0 File Level - choice of a number of the texture, which applies to the model after import
- Flip UV Vertical - will flip vertical texture coordinates
- IMPORT - button to start the import process
To import a model click
Browse button:
Choose .rip the file and click
Open button. Model will load into
3ds max. If you do not like the result, change the
Vertex Layout import mode from
Auto to
Manual, an additional options will be available:
Will attach an image for a visual understanding of what kind of
numbers and what they are accountable (color/area in the image below
correspond to the colors in the image above):
This picture shows the data template of the .rip file. From the
template follows: green zone (model), blue zone (normal), orange zone
(uv, texture coordinates), details:
- vertex data (the model) is based on the first three values (00=x,
01=y, 02=z), also the numbers correspond to what is in the importer,
thus 00=0=x, 01=1=y, 02=2=z. These values can be changed in the
importer to accept any numbers, but in 99.99% of the games these values
remain unchanged, and it is better not to touch them at all
- normal data (for smoothing groups models corresponding to the 03,
04, 05) - in the current version is not complete, changing the values
not yield results
- uv, texture coordinates - represented by two numbers (06, 07, or 07,
08 or 24, 25), not three as in the case of vertices or normals - in 80%
of the games are the same, but there are games (eg: Battlefield : Bad Company 2 or NFS: Run)
where you need to change these values to get proper uv, and sometimes
even go in the values of "normal zone" (ie, they can be 03, 04), but
they are never go into "verte zone". These values need to change
simple by search the numbers. In the picture below - an example.

Thus selecting the model by setting the import (uv, scale, rotation, etc.) then press the
IMPORT button. The model will load into
3ds max.
You can also import models massively. To do this, instead of
Single in
Source Select choose
Group and write the numbers corresponding to the .rip file's name this way: 15,489,0, 50-85 into
RIP File Nums
After setting up import process press
IMPORT button, all files that match the written numbers will be imported into
3ds max.
Note: If files imoported into 3ds max (models/textures) will be to many than 3ds max will crash. So choose and import exactly what ever you wanna work with by looking in textures.
4.
About textures. Textures are always .dds files.
They are automatically loaded into 3ds max. It should be noted that each
model corresponds several textures, for example a model Mesh_0000.rip,
it can have multiple textures with names Tex_0000_1.dds, Tex_0000_2.dds,
Tex_0000_3.dds etc. But you can only load one of these textures in
3ds max. What is the texture will be loaded is selecting in the importer by changing number in Tex.Num function.
Note: If you use a programs for generating "preview" for .dds files in Windows explorer (I use Mystic Thumbs)
then when ripping dx11 games the mini-preview for such .dds will not be
shown, because they have wrong file header, the problem is not solved
yet. However you can edit/view those dx11 .dds files in
photoshop/irfanview/etc.
#now you can easy rip Battlefield 3 :)


